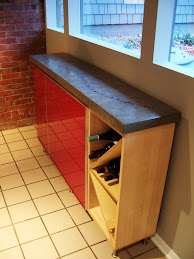
Lately I have not been very happy with my countertop concrete produced using prebagged 5000psi dry concrete mixtures. I have used a number of different brands and they are highly variable on aggregate gradation, coarse aggregate size, and fine aggregate angularity. For someone used to batching concrete in a laboratory, the variable is driving me crazy. I end up usually adding more water than I would like because the aggregate is dirty and one of the last pours had really large aggregate that had to be pulled out by hand. More water results in lower strength, more shrinkage, and inconsistent color. Luckily all of the last countertops have been black which is a little more forgiving. The big size aggregate (I'm talking one bag with a 3/8" top size and the next from the same brand with 1 1/2") and variable workability makes it difficult to get a really nice surface texture. I have spent too much time doing slurry fills and grinding recently.
Last weekend I got a new grill and had to modify our built-in brick grill to fit it. In the process I ended up relaying a bunch of deteriorating brick. That gave me an idea. My best concrete countertops have been placed using mortar. Buying sand and cement and weighing it out in the garage is a pain. Brick mortar comes prebagged, why not develop a countertop mix using as simple as possible products from Lowes, Home Depot, etc. Here goes Project S-Crete.
The rules are simple, create a forgiving countertop mix using Type S masonry mortar mix. Type S mortar mix contains Portland Cement, Hydrated Lime, and Fine Sand. It is designed to produce 1800 psi at 28-days using a water-to-cement ratio of around 0.80. I figure lowering that should up the strength and might make an acceptable mixture. I will be developing a series of iterative mixtures to determine one with acceptable properties. The selected mixture will be used as the top for the grill. The primary concern with using mortar for countertops is shrinkage. Hopefully lowering the w/c and possibly latex will help control any problems with cracking.
Stay tuned for updates and results.
Monday, May 9, 2011


Friday, February 25, 2011
Hyde Park Countertops Part 2
Studiobuild has officially finished the Hyde Park residence. The countertops got installed with minimal damage. After they got installed I spend a weekend doing one last grout and grind session.
 The surface ended up opening a large number of bugholes and for cleanliness those had to get filled.
 I made up a latex grout mixture and worked it into the surface with a trowel and squeegee.
 The old aluminum grinding hood ended up getting chewed up by some walking pads and I broke down and bought a new dust buddie setup. It is clear plastic, lightweight, and very easy to use.
 The concrete was so dry that even wiped down the grout dried very quickly. The latex helps with shrinkage and bonding and provides some strength even if the grout dries before curing.
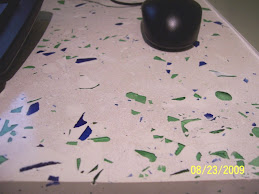
 The finished concrete got two very thin coats of soy-based primer epoxy. The glass is scraps from the owner's jewelry making business.
 This was a quikrete mixture with black granite seeded on the surface, dry black dye at 5%, cellulose fibers, and 1:1 latex modification.


Saturday, February 12, 2011
Hyde Park Countertops Part 1
Recently I have been consulting on a countertop job. Studiobuild is renovating a 1890's house in the Hyde park neighborhood of Kansas City. The owner has black concrete countertops in his current home and wanted them in the new home. So, I came on to coordinate placing the countertops for the new house.
Here we are with the molds setup in at the Studiobuild shop.
 Damon, the owner, handled the dirty work. We used a modified quikrete mix with latex, fibers, and black dye.
 Molds were standard melamine reinforced with plaster mesh.
 Damon's wife makes Murano glass jewelry. He inlaid some glass rods and granite into the surface.
 Jerad and Ryan of Studiobuild assisting damon's friends placing.
 Mmmm, black concrete.
 This kitchen had six pieces and took about 9 cubic feet of concrete.
 Not a bad finished surface.
Monday, January 17, 2011
Adventures in Polyurethane Mold Building Part 2
Sorry for the delay in posting. A large black concrete countertop project came up with StudioBuild, posts for that will be forthcoming.
Alright, mold is constructed. Tiki man is sealed and coated with release again. Let's get going.

Equal parts polyurethane weighed out.

Everything was going well until this point. The tiki man is hollow, so I taped everything off as best as I could. Not good enough and the polyurethane oozed into the mold. Thinking fast, I filled the tiki with lots of plastic bags to help hold back the pressure. The bucket on the top was to hold them down while everything set. In the process the tiki tilted a little.

Next day I stripped the mold and had a tiki man encased in polyurethane. This is the point when the words of wisdom on the manufacturer's website become haunting. Polyurethane is not like silicone. It sticks to everything, and I mean everything. Since I picked the most complicated shape on the planet, getting him back out was not a fun process. It took weeks of steady progress to free our tiki man from his rubber encasement.

Here is the mold separated from the tiki man, a little worse for wear but still ok. The tiki tilted during the pour and came in contact with the side of the mold so the top didn't turn out perfectly. I am going to cut the mold down an inch so everything should be fine. Thank goodness I used a very strong rubber compound because it took some serious pulling to get this sucker off.
 Now for a test pour to see how he looks.
Tuesday, December 14, 2010
Adventures in Polyurethane Mold Building Part 1.
I say adventure because I'm not sure this will turn out. Here is the bamboo tiki light I am attempting to turn into a concrete tiki light holder. I need to build a mold for the rubber (the easy part) and make the lamp water tight (the hard part).
 Here we go, two part polyurethane used to make durable and reusable concrete stamps and molds. It's not cheap but if the mold turns out, I will be able to make a bunch of these to help defray the cost.
  On the left the mold for the mold. On the right, the sealed tikiman. I backed the face area with masking tape and filled in the light bulb access and cord holes with molding clay.
 Then I sprayed everything with a liberal shot of silicone mold release and glued them down. Per manufacturers suggestion there is 1/2inch between the mold and the tikiman. Once the polyurethane is set I will split it in two halves to remove the bamboo.
 The silicone glue will have to set up at least a day before I can make a mess, I mean pour the mold.
 Monday, December 13, 2010
Happenings in the Dr. Concrete World
The weather has turned cold and the miscellaneous outdoor projects that have been keeping me from concrete projects are wrapped up for the year.
Looking towards next year I've got a few fun projects in the works.
1. I now have the domain Dr. Concrete so everything will be migrating to www.drconcrete.net eventually. The website will be a mishmash of different services from consulting to countertops.
2. I will be experimenting with two part polyurethane molds for a couple neat projects. I have been toying around with the idea of making some Tiki torch holders. What better than a tiki to hold them. We got a tiki light as an early Christmas present. I'm going to attempt to turn that into a mold. Don't worry, the light isn't trademarked or copyrighted so I won't get in trouble.
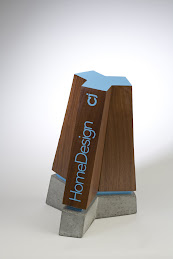
3. I'm teaming with again studiobuild to work on some concrete and wood trophies.
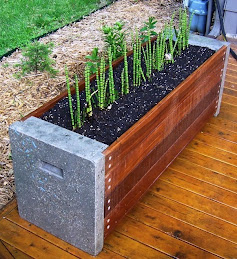
4. I'm doing a limited run of the planters to clear out the rest of the Ipe wood.
Stay tuned for more details.
Looking towards next year I've got a few fun projects in the works.
1. I now have the domain Dr. Concrete so everything will be migrating to www.drconcrete.net eventually. The website will be a mishmash of different services from consulting to countertops.
2. I will be experimenting with two part polyurethane molds for a couple neat projects. I have been toying around with the idea of making some Tiki torch holders. What better than a tiki to hold them. We got a tiki light as an early Christmas present. I'm going to attempt to turn that into a mold. Don't worry, the light isn't trademarked or copyrighted so I won't get in trouble.
3. I'm teaming with again studiobuild to work on some concrete and wood trophies.
4. I'm doing a limited run of the planters to clear out the rest of the Ipe wood.
Stay tuned for more details.
Wednesday, October 27, 2010
Long Overdue
After finishing the patio table for our party I got busy with other things and haven't done much with concrete around the house. I have been doing lots of other concrete work, so I thought I would post some pictures. I do lots of work with pervious concrete. Pervious concrete allows the water to pass through to reduce stormwater runoff.
Last month we placed some experimental pervious concrete on campus to look at a few different mixtures and curing methods. The sidewalk was a difficult location so we ended up using a bobcat.
 This pervious was self-consolidating and I finished a good portion with a mag float.
 The surface before finishing.
 Normally we never use a bull float on pervious, but this mixture was special.
 Putting a fresh joint in with a pizza cutter.
 The completed section. Some of the tests included curing under plastic and leaving some open. The infiltration was between 100-250 in./hr which is acceptable in this location.
Subscribe to:
Posts (Atom)