I recently had a question about how to eliminate pin holes or what we call bug holes. Bug holes are problematic for any concrete which needs to be decorative, whether it be an architectural facade or a countertop.
What they are:
Bug holes are entrapped or entrained air pockets. Entrapped air usually comes from the placing technique when you put concrete in the mold. Entrained air is air caught up in the mixing process. The big bubbles are entrapped air. The little bubbles are usually entrained air.

What causes them:
There are really two things that cause bug holes, the placement and the mix. A third consideration is materials seeded in the surface. First, for placement the mix needs to be flowable enough that minor vibration (tapping the surface) will release the entrapped air. Some of the professionals sell and advocate vibrators. These are great but at $500+ don't make much sense. I would suggest starting at one end and pushing the air out as you progress.
Second, if the mix has lots of air in it, you will have lots of very small air bubbles. Typically high amounts of polymer/latex will cause lots of air bubbles. Various companies sell densifier or defoamer or deair-entraining admixtures to add to concrete mixtures. If you need to add these then the mix is already incorrect. I have tried several products and just have been disappointed. Deair-entrainers are materials with very high surface areas to pull out the surfactants (think soap) that cause the air. The problem is that they also reduce the workability. The integral densifiers are silane or siloxane based sealers which make the air bubbles slippery and the thought is that they escape. I have tried these products and they work much better as a sealer than an integral product unless you are looking for chloride resistance like on a bridge deck. That and a little bottle is like $75.
Third, If you put decorative aggregate on the surface of a mold there is always a small air bubble trapped between the mold and aggregate. This mold below had lots of black aggregate combined with poor consolidation to produce lots of bug holes. The amount of slurry required would turn anyone off of concrete countertops.

How to fix them:
If your concrete is decorative then the bug holes might be interesting. Many exposed concrete building have bug holes on the face which adds texture. On your countertop the bug holes just hold food and are impossible to clean. The only way to fix bug holes is to slurry. My white concrete desk shown below had lots of glass bottles seeded into the surface. Bottles are round and unless the pieces are tiny, have a curved surface which leaves a void. All these voids need to be filled.
If your concrete is decorative then the bug holes might be interesting. Many exposed concrete building have bug holes on the face which adds texture. On your countertop the bug holes just hold food and are impossible to clean. The only way to fix bug holes is to slurry. My white concrete desk shown below had lots of glass bottles seeded into the surface. Bottles are round and unless the pieces are tiny, have a curved surface which leaves a void. All these voids need to be filled.

Step one is to lightly grind the surface to open up any holes that need filling. I like to do a wet sand with a scotch brite pad. Notice the countertop below, a few bug holes on the top and a bunch on the side.

The next step is to slurry. Cheng and a few others sell color matched slurry. I have used Cheng's and I really liked the consistency and the color match was perfect. I could take or leave his concrete mix but the slurry was first class. That being said the consistency and application are crucial. If you look on youtube or get Cheng's DVD for slurry/finishing the consistency is something like this, very thin. This works but takes 2 or 3 coats to fill big holes. The problem is that the surface tension in something this thin will keep it from going in the little pores. You will end up just wiping it over the surface and the little holes keep showing up and laughing at you.

Here is the magic trick. I like to mix my slurry thick. Wipe down the surface so it is damp with a clean sponge and then smear the paste on with another sponge. See how it builds on the sponge, this allows you to press it in the void space. I don't care how big the bug hole is, one pass is all it takes. After you slurry there will be material built up on the surface, don't worry. Let everything sit an hour or two and come back with a wet scotch brite pad. Rub the surface down. The material will be hard enough to stay in the void but soft enough to easily be removed from the surface.

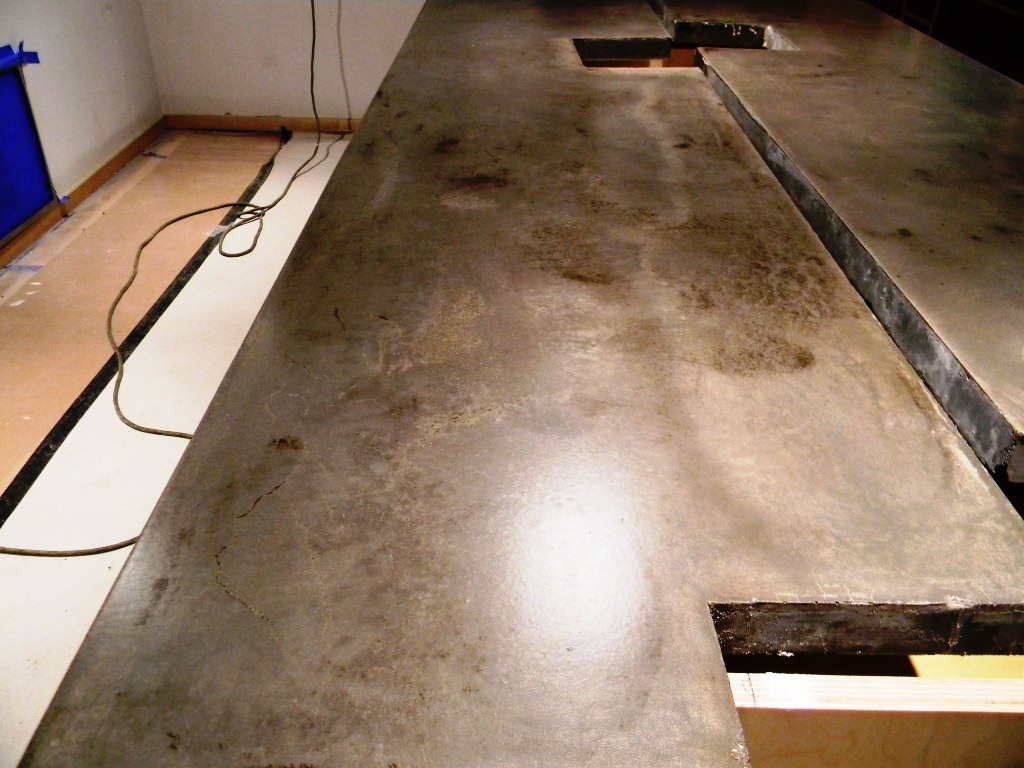
Here is a recently completed countertop placed with a light grey concrete and slurried with a dark grey. We call this honed gun metal, but it probably should be garage floor. If the slurry was color-matched then everything would be light grey. My thought is that if you want one perfect color, go with laminate.

How to eliminate them:
How to eliminate bug holes, there is no perfect way. Consolidate the concrete near the surface as best you can. For a traditional mix I like to place a 1/4 inch and then really work it in with my hands. If you are going to do more than one then GFRC is the way to go. This may be for another series but spraying a face coat eliminates 90% of the bug holes. The mix has no coarse aggregate and is pretty much just fines. The consistency should be enough to easily spray through a gun but stick to a vertical surface. Here is a test shot. Stick to the surface but if you get too much it runs. I spray mine with a normal drywall hopper gun.

If you have specific questions ask. Assuming I get a chance I will try and answer what I can.