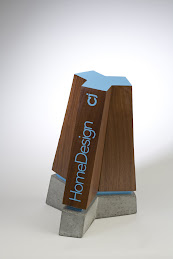
The recent warmer weather has a few projects starting around the house. I am building raised beds for the garden out of ipe wood and have some extra material. I have enough extra to build a couple concrete and ipe planters. Ipe is a very hard, very dense tropical wood that makes great patio furniture.
Mold making for concrete countertops/projects has evolved recently (past 10 years). Cheng started using particle board and laminate then switched to melamine. Every project used fresh mold materials and used lots of drywall screws to keep things from moving. Lately Cheng has switched to foam boards secured with tape. Many other mold builders have switched to foam board and thick vinyl tape for lining the molds. Others have switched to fiberglass or flexible urethane molds. It turns out that most of the older style molds were over-built and wasted too much material. I have built a couple molds lately with little to no screws.
Here is one of the end molds for the concrete planter. It is basically square with knockouts to secure the wood pieces and a handle indentation. Other than a few leftover screws holding together the bottom knockout, there aren't any in this mold.

For the sides I cut the bottom melamine used for the fiber optic topic and sealed the ends with polyurethane. The mold pieces are held down with silicone caulk. Brown was on sale. The knockouts are just leftover plywood coated with polyurethane.

Instead of screwing the braces into the bottom piece and sides, they are secured with caulk too.

A couple minutes later the mold is complete. I let the caulk dry and then fill the seams. After casting the concrete everything comes apart and cleans up easily.

These ends are 4 inches tall and will be held just fine with caulk. The fireplace mold was secured with caulk because I didn't want to drill into my floor. That was 12 inches tall and didn't move at all. Using this technique I can reused my mold pieces and the bottom won't have a scratch.


