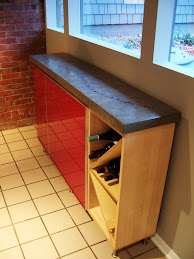
Friday, September 18, 2015
I'm still here
It's been a while since I posted anything and I wanted to give a quick update. It's been a busy summer but not with countertop activities. My group has developed a permeable reactive concrete (PRC) that is designed to treat groundwater and surface water. We are currently and successfully trialing a technology that could easily clean up mine pollution such as from the Colorado mine spill this summer. Moving that technology to market pretty much uses all of my time and unfortunately not good for pictures or blogging. I've turned down several countertop jobs so the market is still there. When I get back to countertops I will post some updates. Until then hold tight.


Friday, December 19, 2014
2323 Project-Finishing Up
The 2323 project has completed. It involved 9 countertop sections, one shower insert, and one window box. The shower and window box were done last and were by far the most complicated.
Here's an in-process shot of gluing up the shower insert mold. Since it was one piece, the mold had to basically come out of the hardened concrete.

It was cold in the shop the night we placed these and it took about 4 hours longer than normal for the concrete to get to a point to trowel the backs.

One thing we know about concrete is that it shrinks. Even with all the relief cuts in the molds, these fought and fought coming out.

In the end everything came out just fine.

So on to some final shots of the installation. Kitchen with metal cabinets.


These countertops had pretty minimal finishing. They got a quick wet grind with 100 grit, slurry to fill any bug holes, then a final grind with 200 grit before sealing. I used ICT from Blue Concrete. This has been by far the best non-film forming coating I have used on countertops. These countertops have been in over a month with normal wear. Plenty of normal kitchen use means spills don't get immediately wiped up, more like dry out and get cleaned up a few days later. Nothing that has gotten spilled has made the slightest difference. I will have some more on that later. I placed a series of test samples and am going to do a round of testing for non-film forming coatings, similar to my previous sealer evaluations.

That is polished/ground only to 200 grit. These got ground after curing 2 days. Normally a shine like this would take to much older and harder concrete. The nice thing is that with my new mix there is less than a week from templating to installation.

The shower pieces installed.

The shelves are tempered glass held in place with stainless pins.

The master bath vanities are pretty simple. The platinum grey works well with the walnut and blue scheme.


Wednesday, November 5, 2014
2323 Project - Part 3 Finishing
Hey, I can see the light at the end of the tunnel on this project. Of the ten total pieces for the job, seven have been installed and three need to be placed.
If you haven't tried lithium silicate densifier, get a gallon and give it a shot. It basically increases the degree of hydration at the surface to make the concrete harder and less porous. I've used these on pavements for a number of years, but when you actually put it on by hand you can feel the concrete tightening up. I have been doing two applications at 50% strength, letting it sit for a day, and then two applications at full strength. They tend to slightly darken the surface which helps bring out the color.

I haven't been forming holes for faucet on these. I think it is easier to cut cut them in later. I bought a cheap diamond hole saw set at Harbor Freight for like $10 which works well enough.

A few installed and the sink getting siliconed to the bottom.

The bathroom sinks are a basin that just sits on top.

After applying the densifier I then have been applying a few coats of silane. I have been playing around with application techniques for the silane water proofer. This is after cutting it with some water and buffing lightly with a mild abrasive pad.

Tuesday, October 14, 2014
2323 Project Part 2 - Placing
Well like usual scope creep has reared it's ugly head. Well since this is my project and money I guess that is ok. This project has now gone from six pieces in the kitchen to include some vanities a shower box and an integral window box.
I've seen some guys recently cover the melamine edges with painter's tape and am giving it a try. So far it seems to help with cleanup some and probably prevents some swelling.

The first two pieces were a large plain countertop and the sink section. The mix is my el-cheapo ($5.5/sf) GFRC mix with some Cheng integral color.

They were stripped after 2 days and lightly wet-ground. There were only a couple bug holes and prep was very minimal. The cell phone didn't take too good of pictures of the ground texture and I will have to remember to bring the real camera along next time.

The next step for these is burnishing and sealing. When GFRC works well it is unbelievable how little work is involved after placing.
Friday, October 3, 2014
2323 Project Part 1-Molds
The next project is underway and will be moving quickly. It's a renovation with six pieces in the kitchen and two in the master bathroom. The original steel cabinets are being reused and have been powder coated turquoise. The countertop color will be platinum grey. I've modified my low-cost Type S mortar GFRC mix to use Cheng Promix for the color and don't need any additional admixtures. I could formulate my own pigments, but for the time and project size their kits are the easiest. I always have way too much pigment leftover when I do it myself and this cuts down on long-term storage. Tests on this semi-original mix were 5000 psi at 7 days so I think we are fine.
There are four standard countertop pieces and a 36 inch deep island with a waterfall edge.


Those stainless steel ball tools make caulking a breeze and are one of the best $1.99 I have ever spent.

Here's a shot of the kitchen before cabinets were set. The wall are grey, white upper cabinets, some custom walnut cabinets, and turquoise lower cabinets. The bright grey countertops will look great.

I'm using a new sealer combination on this one. The three part Richard James system worked very well on the last big sink but it is film forming. The owner on this one doesn't want that look in the kitchen. I've been working with lithium silicate densifiers for curing conventional concrete and have been very impressed. They improve overall durability and stain resistance. I'm going to combine lithium silicate with a silane to get a finish that shouldn't need much attention over time.
Wednesday, July 30, 2014
Where Regular Utility Concrete and Finished Concrete Converge
Recently this question was posted on the blog. Assuming you haven't read everything on the blog in detail, I thought this would be a good question to reiterate some commonalities and differences between "outside" concrete and "inside" concrete.
Do you add #3 re-bar to that? I want to do this for an outdoor bbq island. Can you get a concrete pumping company to come and form it, or is that something you need to arrange ahead of time? I'm assuming you need a nice smooth finish on it so drinks don't spill.
First, the main difference between exterior and interior concrete is what is termed exposure condition. Imagine two pieces of chalk, one inside and one outside. Which lasts longer? The inside one of course, but why? Water. Water is the primary mechanism of deterioration for concrete. It carries bad stuff in, like chlorides and sulfates. It carries good stuff out, like calcium hydroxide. It can also cause physical deterioration, think the grand canyon. And most importantly for many of us, it expands when freezing. So the biggest difference between interior and exterior concrete is the need for air entrainment in exterior concrete for freeze-thaw durability. If you are in warm areas then there isn't as much of a difference.

Secondly, on the topic of who to do it. Concrete is supplied by a ready mixed concrete producer or you can make it using bagged concrete and a rented mixer. It all depends on the volume. A normal mixer you can rent from Home Depot holds around 2 cubic feet of wet concrete . There are 27 cubic feet in a cubic yard and a concrete mixer truck holds up to 10 cubic feet. So that is 135 batches in a rented mixer. There is a significant up-charge if you are only ordering a small amount of concrete because the producer would rather have their trucks fully-utilized. A general or specialty concrete contractor would be appropriate to form the bbq island and would generally coordinate ordering the concrete if a ready mixed supplier is needed. If there is no way to get the concrete from the truck to the bbq then they may rent a concrete pump truck for a few hours. Yes, all that needs to be arranged ahead of time and probably through your contractor.
Realistically, unless you are pouring the world's biggest backyard bbq, ready mix concrete with a pump truck is not needed.


Do you add #3 re-bar to that? I want to do this for an outdoor bbq island. Can you get a concrete pumping company to come and form it, or is that something you need to arrange ahead of time? I'm assuming you need a nice smooth finish on it so drinks don't spill.
First, the main difference between exterior and interior concrete is what is termed exposure condition. Imagine two pieces of chalk, one inside and one outside. Which lasts longer? The inside one of course, but why? Water. Water is the primary mechanism of deterioration for concrete. It carries bad stuff in, like chlorides and sulfates. It carries good stuff out, like calcium hydroxide. It can also cause physical deterioration, think the grand canyon. And most importantly for many of us, it expands when freezing. So the biggest difference between interior and exterior concrete is the need for air entrainment in exterior concrete for freeze-thaw durability. If you are in warm areas then there isn't as much of a difference.
Secondly, on the topic of who to do it. Concrete is supplied by a ready mixed concrete producer or you can make it using bagged concrete and a rented mixer. It all depends on the volume. A normal mixer you can rent from Home Depot holds around 2 cubic feet of wet concrete . There are 27 cubic feet in a cubic yard and a concrete mixer truck holds up to 10 cubic feet. So that is 135 batches in a rented mixer. There is a significant up-charge if you are only ordering a small amount of concrete because the producer would rather have their trucks fully-utilized. A general or specialty concrete contractor would be appropriate to form the bbq island and would generally coordinate ordering the concrete if a ready mixed supplier is needed. If there is no way to get the concrete from the truck to the bbq then they may rent a concrete pump truck for a few hours. Yes, all that needs to be arranged ahead of time and probably through your contractor.
Realistically, unless you are pouring the world's biggest backyard bbq, ready mix concrete with a pump truck is not needed.
(Photo courtesy of Concrete Exchange)
Thirdly, the topic of reinforcement allows a short soap-box sermon. Rebar, steel reinforcement, is put in concrete to carry tensile load and minimize loss of life during extreme events. If something happens, earthquake, extreme snows, overloading, etc., our concrete structures are designed to crack which signals occupants to get out. The design codes specifically forbid over reinforcing. If too much steel is present then the occupants don't see the cracks before the building/structure falls down. So more is not better when it comes to reinforcing concrete. Also, steel doesn't do anything unless the concrete cracks. No cracks mean the steel isn't needed at the current time. That begs the question, why reinforce a bbq grill? Hopefully there isn't a concern for loss of life. Most likely the in-service loading will be very, very, very well under the capacity of the concrete. Really any reinforcement is there to hold it together on the off chance there is a crack during transportation or finishing. If that is the case do you need rebar or will something else work? With rebar you have to tie it off so it is located at a particular position in the slab. This can be a challenge for experienced contractors let alone a novice at home. I prefer to use polypropylene fibers. They are mixed into the concrete, don't corrode, and can bridge lots of little cracks at the same time. FYI, I don't use rebar in floor slabs, driveways, or parking lots. Most highways also don't use rebar either. Rebar is commonly used in structural applications, not thin slabs.
Lastly, unless you are putting concrete countertops on a boat or plane, smoothness isn't going to impact drinks spilling. However, you probably don't want a broomed finish on a bbq grill top. The smoother the concrete the easier to clean up spills.
Hello McFly, Is Anyone Home
Yes, I'm still here. We sold our house, bought one, and are in the middle of a major renovation. In the meantime we are living in an apartment and all of the countertop making equipment is in storage. I will be placing countertops for the kitchen and will start making progress as soon as the cabinet bases are set. We are keeping the original steel cabinets and having them stripped and powder coated.
The house was built in 1950. It is an expanded shale, lightweight cmu with a 2 inch air gap to brick. That combined with some interior spray foam means we will be very energy efficient.

Have no fear, there will be plenty of future concrete projects.
Wednesday, October 9, 2013
That's One Big Sink
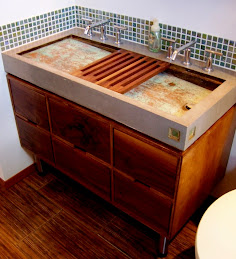
The latest Studio Build project is wrapping up and that included installing a few small, and one very big, concrete items. It seems everything but the kitchen countertops are concrete. The fireplace surround is GFRC polished through 3000 grit and coated with beeswax. The bathroom countertops were lightly ground and sealed. The big piece was an eight and a half foot long integral sink in the master bath. It is also GFRC. This is a perfect example of where GFRC is far superior to conventional mixes. If we did this conventionally it would have weighed about 500 lbs. Since we did GFRC it only weighed 240 lbs. My biceps are still sore from carrying this in, but a 50% weight and material savings makes it manageable. It's charcoal grey and was coated with the Richard James sealer kit.

Recently I performed another sealer roundup using some scrap pieces lying around. It gives me an excuse to break out the beers on a Saturday morning. My standard test materials are vinegar, hot sauce, toothpaste, red wine, mustard, and an icy cold beer for a sweat stain. I was very impressed with the performance of the Richard James silane, epoxy, urethane combination. I normally densify the surface using a lithium silicate, which makes this a four step process. That is a lot more effort and cost than the traditional acrylic, but the results are worth it. None of these liquids had any effect on the surface.
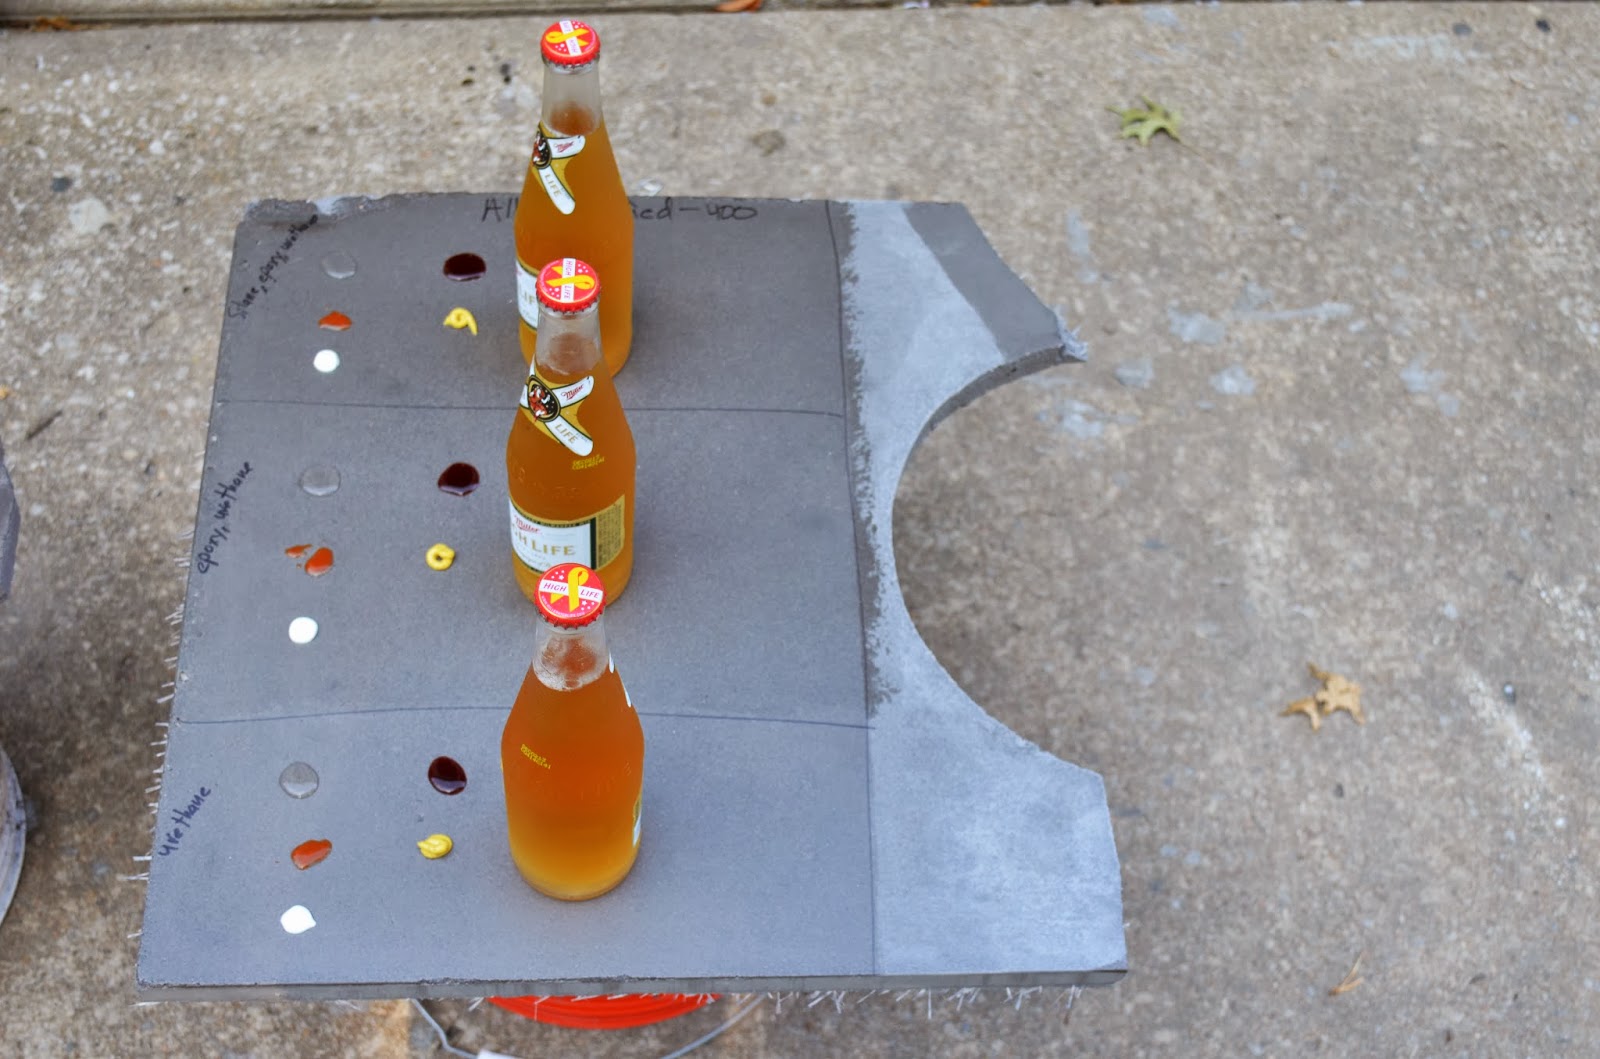
The very dark section was beeswax applied to a highly polished surface. It looks very cool and is a great color enhancer, however beeswax doesn't provide much protection against acid attack and requires constant recoating.

Thursday, August 15, 2013
Arms Race
I have enough work coming up in the next few months that I could justify adding one more piece of equipment. I picked up a planetary grinder setup for dry grinding. The conventional grinder works but takes a long time and requires enough pressure that the thoughts of doing more than one kitchen make my arms hurt. The planetary grinder gets the job done about 5 times faster and has enough weight that all I have to do is hold on. This should pay off in time very quickly.

For a test I quickly ran up through 3000 grit on spare piece in the garage. Although you wouldn't go up to 3000 for a kitchen or bathroom, I just wanted to see how it works. This is a 30 inch by 20 inch piece and it took less than 20 minutes to work from 50 to 3000. The general surface texture is much better/more consistent than the single head unit.

It will be a busy fall.
On-going and Up-coming Projects:
1. Concrete planters
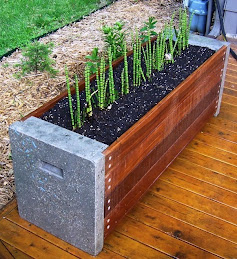
2. Fireplace surround, bathroom vanities, bathroom sink, and bar top for a new remodel
3. Island countertop
4. Kitchen remodel
Sunday, May 19, 2013
Buffon Residence: Final Installation Photos
The Buffon residence is cleaned up for appraisal so I took the opportunity to grab some finished pictures. The entire project consisted of twelve sections which included one giant 4 ft by 12 ft island.

The color is dark grey with a urethane sealer.


Half bath off the kitchen.

Full bath.
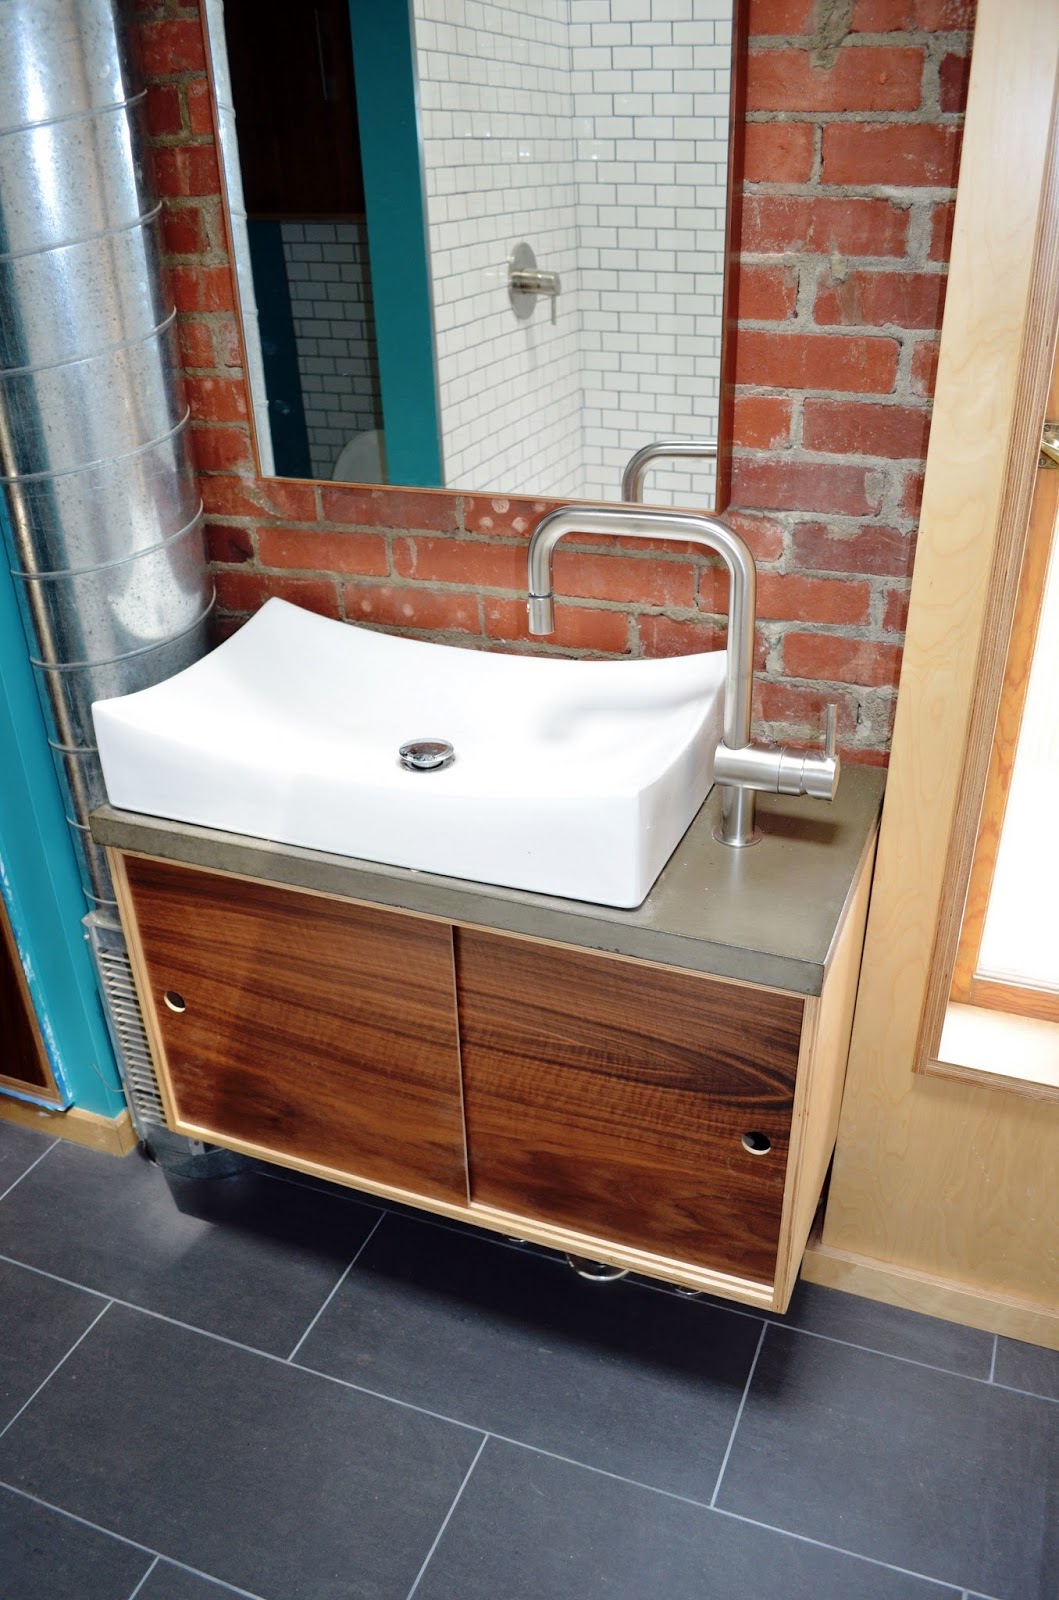
Extra panels used for the color check were cut down for the fireplace surround.

Thursday, May 2, 2013
Coming Soon
Some very cool things are cooking over at creating concrete countertops. I have developed a series of low cost countertop mixes that will be marketed regionally. Along with these will come a series of training sessions. The mixes include a 1) pressed mottled finish, 2) standard countertop, 3) self-consolidating mixture, 4) glass fiber reinforced concrete face coat, 5) glass fiber reinforce concrete backer coat, 6) self consolidating fiber reinforced mixture, and 7) fiber reinforced pressed mixture for unique shapes and furniture.
In preparation for the training courses I will provide a complete how to for mold construction, concrete placement, through finishing. I am evaluating some new sealers and application techniques that should prove helpful to the budget-minded person. The whole point of this exercise is to let the average or slightly handier than average person create some great products. I'm making some new planters which should be a nice project to show the new techniques.
http://www.murraydecorative.com/mdc_seminars.php
http://www.murraydecorative.com/mdc_seminars.php
Thursday, February 7, 2013
Not Too Shabby
The other weekend it was in the mid-50's in Kansas City and sunny. Not a bad day to slurry some countertops on the back patio.

The Buffon countertop project is well finished, but the house project is not. As soon as the countertops got installed they were covered with construction debris. Once that is cleared up I will post a big summary of the project.
Sunday, December 2, 2012
Buffon Project Progress
The Buffon project is just about finished. Once everything is in place I will get the completed pictures.
Here is the setup for the island pour. The island is 44 inches by 12 feet. It was cast off site and carried into place.

A cell phone shot after finishing the pour. The hollow spot in the back is the section over the cabinet, the rest is solid and overhangs.

It took 8 people but the island top is in place. The island is wrapped on both ends by solid concrete pieces.

Tuesday, October 16, 2012
Internal Curing Concrete with Super Absorbent Polymers
In the previous post I mentioned adding a super absorbent polymer (SAP) to the mixture to improve curing and eliminate having to put plastic on the fresh concrete. I have been using SAPs for a number of years in traditional concrete and have been very happy with the results in countertops.
A little background:
Concrete gets hard through a chemical reaction called hydration. Various cement components dissolve and recombine to make concrete hard. The ultimate strength and durability is related to the cement chemistry and amount of water in the system. Lower the water-to-cement (w/c) ratio the stronger the mixture. Unfortunately the hydration products occupy a smaller volume in their hardened state than in the fresh state, so concrete shrinks. At w/c less than 0.42 this shrinkage can be significant enough to crack the concrete from within. Also at low w/c the permeability of the hydrating paste is so low that water can't get in. If you break a low w/c mixture that has been stored in water, the middle will be dry and hydration has stopped. Hey, wouldn't it be nice if we could include some extra water in the mix that the cement can use during the hydration process? Yes and in comes SAPs.
SAPs basically soak up a bunch of water, expand, and give the water back one time. They aren't like sponges and only have a single use. Since we put more water in the mix than is needed for complete cement hydration, adding a SAP to soak up the extra water will help in the long run. The other thing needed for a good SAP is a small particle size for good distribution. Baby diapers are SAPs but the polymer grains are very large and would leave big bubbles if used in concrete. The particle size of the SAP I use is designed to work well within concrete.
The version of SAP I use is called Hydromax. You can buy a 4 lb canister for about $80 which is sized for 8 cubic yards of concrete. That one container is enough for 40 or so normal sized kitchens. The dosage rate is 2 oz per 100 lbs of cementitious material in your mixture. Just throw the SAP in with the mix and proceed as normal. It will not produce any noticeable changes in the mixture. Overall these mixtures gain strength faster, have better overall strength, and less shrinkage.
One thing to note, SAPs are very fun to play with. If your kids or drunk neighbors get ahold of them you may run out from all the experiments.
A little background:
Concrete gets hard through a chemical reaction called hydration. Various cement components dissolve and recombine to make concrete hard. The ultimate strength and durability is related to the cement chemistry and amount of water in the system. Lower the water-to-cement (w/c) ratio the stronger the mixture. Unfortunately the hydration products occupy a smaller volume in their hardened state than in the fresh state, so concrete shrinks. At w/c less than 0.42 this shrinkage can be significant enough to crack the concrete from within. Also at low w/c the permeability of the hydrating paste is so low that water can't get in. If you break a low w/c mixture that has been stored in water, the middle will be dry and hydration has stopped. Hey, wouldn't it be nice if we could include some extra water in the mix that the cement can use during the hydration process? Yes and in comes SAPs.
SAPs basically soak up a bunch of water, expand, and give the water back one time. They aren't like sponges and only have a single use. Since we put more water in the mix than is needed for complete cement hydration, adding a SAP to soak up the extra water will help in the long run. The other thing needed for a good SAP is a small particle size for good distribution. Baby diapers are SAPs but the polymer grains are very large and would leave big bubbles if used in concrete. The particle size of the SAP I use is designed to work well within concrete.
The version of SAP I use is called Hydromax. You can buy a 4 lb canister for about $80 which is sized for 8 cubic yards of concrete. That one container is enough for 40 or so normal sized kitchens. The dosage rate is 2 oz per 100 lbs of cementitious material in your mixture. Just throw the SAP in with the mix and proceed as normal. It will not produce any noticeable changes in the mixture. Overall these mixtures gain strength faster, have better overall strength, and less shrinkage.
One thing to note, SAPs are very fun to play with. If your kids or drunk neighbors get ahold of them you may run out from all the experiments.
Sunday, September 16, 2012
How to Avoid Bug Holes, Pin Holes, and Other Nasty Surface Imperfections in Concrete Countertops
I recently had a question about how to eliminate pin holes or what we call bug holes. Bug holes are problematic for any concrete which needs to be decorative, whether it be an architectural facade or a countertop.
What they are:
Bug holes are entrapped or entrained air pockets. Entrapped air usually comes from the placing technique when you put concrete in the mold. Entrained air is air caught up in the mixing process. The big bubbles are entrapped air. The little bubbles are usually entrained air.

What causes them:
There are really two things that cause bug holes, the placement and the mix. A third consideration is materials seeded in the surface. First, for placement the mix needs to be flowable enough that minor vibration (tapping the surface) will release the entrapped air. Some of the professionals sell and advocate vibrators. These are great but at $500+ don't make much sense. I would suggest starting at one end and pushing the air out as you progress.
Second, if the mix has lots of air in it, you will have lots of very small air bubbles. Typically high amounts of polymer/latex will cause lots of air bubbles. Various companies sell densifier or defoamer or deair-entraining admixtures to add to concrete mixtures. If you need to add these then the mix is already incorrect. I have tried several products and just have been disappointed. Deair-entrainers are materials with very high surface areas to pull out the surfactants (think soap) that cause the air. The problem is that they also reduce the workability. The integral densifiers are silane or siloxane based sealers which make the air bubbles slippery and the thought is that they escape. I have tried these products and they work much better as a sealer than an integral product unless you are looking for chloride resistance like on a bridge deck. That and a little bottle is like $75.
Third, If you put decorative aggregate on the surface of a mold there is always a small air bubble trapped between the mold and aggregate. This mold below had lots of black aggregate combined with poor consolidation to produce lots of bug holes. The amount of slurry required would turn anyone off of concrete countertops.
There are really two things that cause bug holes, the placement and the mix. A third consideration is materials seeded in the surface. First, for placement the mix needs to be flowable enough that minor vibration (tapping the surface) will release the entrapped air. Some of the professionals sell and advocate vibrators. These are great but at $500+ don't make much sense. I would suggest starting at one end and pushing the air out as you progress.
Second, if the mix has lots of air in it, you will have lots of very small air bubbles. Typically high amounts of polymer/latex will cause lots of air bubbles. Various companies sell densifier or defoamer or deair-entraining admixtures to add to concrete mixtures. If you need to add these then the mix is already incorrect. I have tried several products and just have been disappointed. Deair-entrainers are materials with very high surface areas to pull out the surfactants (think soap) that cause the air. The problem is that they also reduce the workability. The integral densifiers are silane or siloxane based sealers which make the air bubbles slippery and the thought is that they escape. I have tried these products and they work much better as a sealer than an integral product unless you are looking for chloride resistance like on a bridge deck. That and a little bottle is like $75.
Third, If you put decorative aggregate on the surface of a mold there is always a small air bubble trapped between the mold and aggregate. This mold below had lots of black aggregate combined with poor consolidation to produce lots of bug holes. The amount of slurry required would turn anyone off of concrete countertops.

How to fix them:
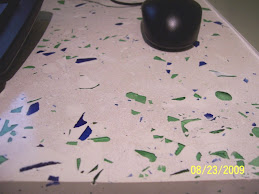
If your concrete is decorative then the bug holes might be interesting. Many exposed concrete building have bug holes on the face which adds texture. On your countertop the bug holes just hold food and are impossible to clean. The only way to fix bug holes is to slurry. My white concrete desk shown below had lots of glass bottles seeded into the surface. Bottles are round and unless the pieces are tiny, have a curved surface which leaves a void. All these voids need to be filled.
If your concrete is decorative then the bug holes might be interesting. Many exposed concrete building have bug holes on the face which adds texture. On your countertop the bug holes just hold food and are impossible to clean. The only way to fix bug holes is to slurry. My white concrete desk shown below had lots of glass bottles seeded into the surface. Bottles are round and unless the pieces are tiny, have a curved surface which leaves a void. All these voids need to be filled.

Step one is to lightly grind the surface to open up any holes that need filling. I like to do a wet sand with a scotch brite pad. Notice the countertop below, a few bug holes on the top and a bunch on the side.

The next step is to slurry. Cheng and a few others sell color matched slurry. I have used Cheng's and I really liked the consistency and the color match was perfect. I could take or leave his concrete mix but the slurry was first class. That being said the consistency and application are crucial. If you look on youtube or get Cheng's DVD for slurry/finishing the consistency is something like this, very thin. This works but takes 2 or 3 coats to fill big holes. The problem is that the surface tension in something this thin will keep it from going in the little pores. You will end up just wiping it over the surface and the little holes keep showing up and laughing at you.

Here is the magic trick. I like to mix my slurry thick. Wipe down the surface so it is damp with a clean sponge and then smear the paste on with another sponge. See how it builds on the sponge, this allows you to press it in the void space. I don't care how big the bug hole is, one pass is all it takes. After you slurry there will be material built up on the surface, don't worry. Let everything sit an hour or two and come back with a wet scotch brite pad. Rub the surface down. The material will be hard enough to stay in the void but soft enough to easily be removed from the surface.

Here is a recently completed countertop placed with a light grey concrete and slurried with a dark grey. We call this honed gun metal, but it probably should be garage floor. If the slurry was color-matched then everything would be light grey. My thought is that if you want one perfect color, go with laminate.

How to eliminate them:
How to eliminate bug holes, there is no perfect way. Consolidate the concrete near the surface as best you can. For a traditional mix I like to place a 1/4 inch and then really work it in with my hands. If you are going to do more than one then GFRC is the way to go. This may be for another series but spraying a face coat eliminates 90% of the bug holes. The mix has no coarse aggregate and is pretty much just fines. The consistency should be enough to easily spray through a gun but stick to a vertical surface. Here is a test shot. Stick to the surface but if you get too much it runs. I spray mine with a normal drywall hopper gun.

If you have specific questions ask. Assuming I get a chance I will try and answer what I can.
Subscribe to:
Posts (Atom)