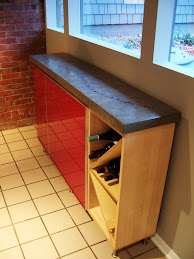
Alright, our concrete has stayed nice and moist for a few days and has gained some strength. Now comes the finishing. Finishing takes that boring looking piece and really makes it stand out. We must first distinguish finishing techniques. Concrete can be ground or polished using either wet or dry techniques.
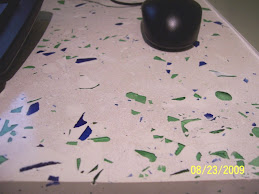
Grinding - We consider the grinding phase when finishing young concrete (5-7 days old) with sanding grits less than 400 grit. Typically grinding is very aggressive to expose decorative aggregate or glass. At about 7-days old the concrete becomes too hard to grind and tends to go through grinding pads quickly.
Polishing - Polishing is finishing older/harder concrete with pads 400 to 1,500 or 3,000 grit. This produces the shiny glass-like surface.
Depending on the project you can have various grinding/polishing levels.
- Unground/unpolished is the concrete as is
- Ground/unpolished exposes aggregate but leaves a dull surface
- Ground/polished exposes aggregate with a shiny surface
- Unground/polished leaves the uniformly colored cream on a shiny surface without exposing any aggregate.
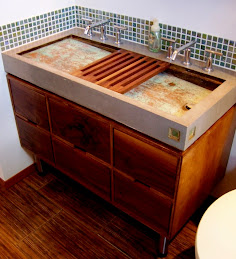
The sink contains no aggregate so only a light grind was applied to the surface at 5-days after casting. These are backsplash pieces with inlaid tiles. The top piece had a light grinding while the bottom shows the piece straight from the mold. Notice the ground piece has a slightly darker color. The concrete surface has high levels of calcium hydroxide (free lime) which is white. Grinding removes this layer.

After the concrete had cured an additional 5 days (10 days after casting), the polishing begins. For this project I used a wet grinding technique with a pneumatic grinder, since I have a large two cylinder air compressor. Wet-feed electric grinders are available. Wet grinding poses a few interesting logistical items. First, a constant supply of water is required. Mine was from a hose and milk jug with a few holes. Second, the water needs somewhere to go. My rolling cart allow the grinding to be done outside so the water just ran into the yard. Polishing inside requires capturing the water. These items mean that wet grinding requires some forethought on the setup. Notice the plastic lip on the table to prevent me from getting wet. Plan on wet grinding in a swimsuit, it makes a mess.

The first round of grinding/polishing will open up some bug holes. These are small pockets of air which stuck to the mold when the concrete was cast. Most project for the kitchen or bathroom require a smooth surface for cleaning purposes, so the holes need to be filled. There are several colored-matched slurry kits available. These contain colored, polymer-modified cement paste (no aggregate or sand) which is used to coat the surface and fill the holes. Here is a picture of the sink after a slurry coat. The chips in the front lip of the sink were filled with this slurry. Small holes are generally filled with one application. Larger holes may require two or three slurry coats.

After the slurry coats were finished, stains can be applied. Stains consist of water or acid borne pigments which penetrate the concrete surface leaving behind a color. Since the vanity for this sink will have walnut drawers, the sides of the sink got a walnut color.

The sink was wet polished through 1,500 grit. As you see it is glass smooth and very reflective. The next project will use a dry-grinding technique.

After polishing we can consider sealing/surface protection options.
 Really this project hasn't taken much time or money. The mold only took a few hours to build and get in place. The concrete was 6 bags of quikcrete at $4.50 each, 3 gallons of latex at $10 each, $10 worth of pigment, and about $10 for reinforcing steel. The concrete placement only took about 4 hours from buying the materials to setting up, placing, and clean up. The real cost was the dry grinding setup since most people are against wet grinding in their living rooms. Although if you are planning on two or more project, the speed and cleanliness of the dry setup is well worth the money.


 The tile was held on with a combination of mortar and construction adhesive. Either way the underlying material is very rough and will create a great bond with the new concrete.
 The new concrete will be about 1 1/2" out from the original. Because of the small clearance the concrete will have a maximum aggregate size of 3/8" to allow placement.
 Since the floor is concrete and I did not want to drill into the slab, the mold has feet out from the front and back. Silicone adhesive was used to seal the mold to the concrete and glue it into place. It will be fine as long as the concrete is not vibrated too much during placement. In order to accomplish this, the concrete for this placement will be self consolidating.
 Due to the upcoming volume of pieces that will be created this summer I have started modifying a
  The copper patina was chemically accelerated. Although I made