Monday, January 17, 2011

Adventures in Polyurethane Mold Building Part 2

Sorry for the delay in posting. A large black concrete countertop project came up with StudioBuild, posts for that will be forthcoming.
Alright, mold is constructed. Tiki man is sealed and coated with release again. Let's get going.

Equal parts polyurethane weighed out.

Everything was going well until this point. The tiki man is hollow, so I taped everything off as best as I could. Not good enough and the polyurethane oozed into the mold. Thinking fast, I filled the tiki with lots of plastic bags to help hold back the pressure. The bucket on the top was to hold them down while everything set. In the process the tiki tilted a little.

Next day I stripped the mold and had a tiki man encased in polyurethane. This is the point when the words of wisdom on the manufacturer's website become haunting. Polyurethane is not like silicone. It sticks to everything, and I mean everything. Since I picked the most complicated shape on the planet, getting him back out was not a fun process. It took weeks of steady progress to free our tiki man from his rubber encasement.

Here is the mold separated from the tiki man, a little worse for wear but still ok. The tiki tilted during the pour and came in contact with the side of the mold so the top didn't turn out perfectly. I am going to cut the mold down an inch so everything should be fine. Thank goodness I used a very strong rubber compound because it took some serious pulling to get this sucker off.
Now for a test pour to see how he looks.

Tuesday, December 14, 2010

Adventures in Polyurethane Mold Building Part 1.

I say adventure because I'm not sure this will turn out. Here is the bamboo tiki light I am attempting to turn into a concrete tiki light holder. I need to build a mold for the rubber (the easy part) and make the lamp water tight (the hard part).
Here we go, two part polyurethane used to make durable and reusable concrete stamps and molds. It's not cheap but if the mold turns out, I will be able to make a bunch of these to help defray the cost.
On the left the mold for the mold. On the right, the sealed tikiman. I backed the face area with masking tape and filled in the light bulb access and cord holes with molding clay.
Then I sprayed everything with a liberal shot of silicone mold release and glued them down. Per manufacturers suggestion there is 1/2inch between the mold and the tikiman. Once the polyurethane is set I will split it in two halves to remove the bamboo.
The silicone glue will have to set up at least a day before I can make a mess, I mean pour the mold.

Monday, December 13, 2010

Happenings in the Dr. Concrete World

The weather has turned cold and the miscellaneous outdoor projects that have been keeping me from concrete projects are wrapped up for the year.
Looking towards next year I've got a few fun projects in the works.
1. I now have the domain Dr. Concrete so everything will be migrating to www.drconcrete.net eventually. The website will be a mishmash of different services from consulting to countertops.
2. I will be experimenting with two part polyurethane molds for a couple neat projects. I have been toying around with the idea of making some Tiki torch holders. What better than a tiki to hold them. We got a tiki light as an early Christmas present. I'm going to attempt to turn that into a mold. Don't worry, the light isn't trademarked or copyrighted so I won't get in trouble.
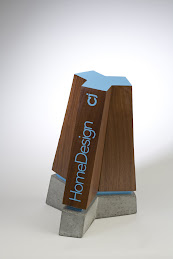
3. I'm teaming with again studiobuild to work on some concrete and wood trophies.
4. I'm doing a limited run of the planters to clear out the rest of the Ipe wood.
Stay tuned for more details.

Wednesday, October 27, 2010

Long Overdue

After finishing the patio table for our party I got busy with other things and haven't done much with concrete around the house. I have been doing lots of other concrete work, so I thought I would post some pictures. I do lots of work with pervious concrete. Pervious concrete allows the water to pass through to reduce stormwater runoff.
Last month we placed some experimental pervious concrete on campus to look at a few different mixtures and curing methods. The sidewalk was a difficult location so we ended up using a bobcat.
This pervious was self-consolidating and I finished a good portion with a mag float.
The surface before finishing.
Normally we never use a bull float on pervious, but this mixture was special.
Putting a fresh joint in with a pizza cutter.
The completed section. Some of the tests included curing under plastic and leaving some open. The infiltration was between 100-250 in./hr which is acceptable in this location.

Friday, June 4, 2010

Concrete Patio Table (Part 4. Finished)

Amongst many other projects, the concrete patio table is finished. The surface was polished up through 800 grit, sealed with an experimental colloidal silica topping, and then coated with the soy-epoxy. I don't know how the silica densifier and epoxy will play together. We will have to wait and see.
A shot of the bottom. Since nobody sees this I wanted some kind of texture when people put their hands underneath.
The concrete was cast right-side-up and the glass and embeds we seeded into the surface and troweled in.
I rubbed down the epoxy with fine steel wool before waxing. Stainless steel tapcons secured the concrete to the base.

Monday, May 17, 2010

Concrete Patio Table (Part 3. Grinding)

The table was demolded after 2 days. I ground the surface with a diamond cup wheel to get through all the surface paste and remove any trowel or plastic marks. White and green glass pieces were broadcast in opposite arcs across the surface.
Now that the surface is flat, it will get ground through 400 grit before filling. I will wait a couple days before flipping it over and grinding the bottom.


Saturday, May 15, 2010

Concrete Patio Table (Part 2. Placing Concrete)

After a few more cans of spray foam and sanding, the shape was pretty close. This reminds me of building the molds for concrete canoes, although on a much smaller scale. The bottom square is the 3" mounting base. Then the table underside tapers from 2 inches thick in the middle to 1 inch at the edge. Since the foam is hard to get real smooth and with a short time frame to get this done, I lined the mold with plastic. It will either 1. look cool, or 2. need a bunch of grinding to smooth the bottom side.
I cut some tile backer steel mesh to insert into the top. This won't provide any extra strength, but will help keep any cracks tight. Like most concrete designs this hopefully shouldn't do anything and is there should cracks form.
Now is that concrete green enough for you? This is a modified version of my now standard self-consolidating mortar that has been working well. This mix is a high strength 2.5:1 sand to cement mortar at a 0.4 water to cement ratio. The concrete was produced using white cement, high range water reducer, air entrainer, and both cellulose and polypropylene fibers. The green pigment was dosed at 3% by weight of cement.
I seeded some white and forest green glass into the surface and broke down and put some Cheng fossils into the surface. With all of the fibers there will be more than a little grinding and torching to get the surface smooth.